


Many Woodward software tools have the ability to perform additional features if a software license is purchased. Some of these features include:
Gap - Monitor
Gap - Editor
Control Assistant - Trending
AppManager - Enterprise Level Datalog Collection (More than 3 CPUs)
If a license option is available for a service tool, an option named "License" should be listed in the dropdown menu.
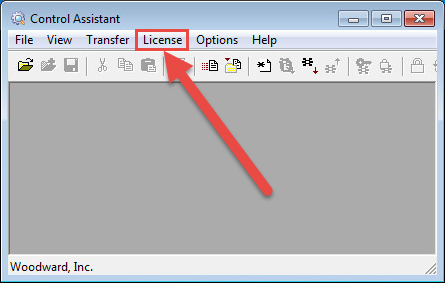
Figure 1: Control Assistant example of License menu option showing that additional features are available.
Step 1
To activate a Woodward product, a software license must be purchased from Woodward in the form of a serial number. Contact the equipment OEM or local Woodward distributor to purchase a license. If a license has already been purchased, locate the serial number provided during the purchase process. Woodward does not track serial numbers sold to customers so they can not be recovered by contacting Woodward Support. This information should have been included in the original purchase order for the license, so that is the best place to find these records.
Step 2
Once a serial number has been obtained, the Site Code must be identified. The Site Code is the unique identifier for the local computer that is used along with the serial number to generate the license key. This Site Code can be found by selecting the Authorize option in the License menu. If the option is grayed out, the service tool has already been licensed.
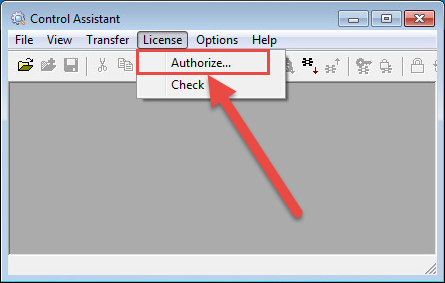
Figure 2: Control Assistant example of the Authorize menu option active, which means the tool is unlicensed.
Step 3
The Authorize menu option will begin the licensing process which starts with the Device Selection screen. This allows the user to select the license location, such as the local C: drive or removable storage, such as a flash drive. There are advantages and disadvantages to each option, but many customers find a flash drive advantageous because it can be easily moved between computers in case of hard drive replacement, upgrade, or failure.
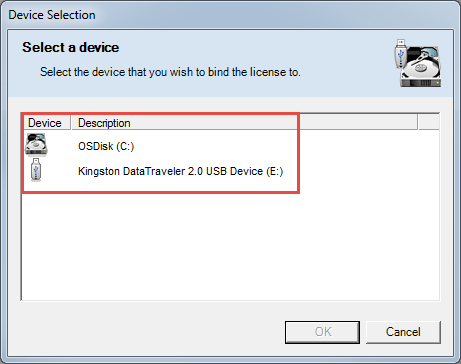
Figure 3: Control Assistant example of Device Selection screen.
Step 4
Once the device to license has been selected, the License Authorization screen will appear. This screen provides the Site Code and a field for a License Key to be entered. This Site Code must be entered into the Woodward website along with the serial number, so copy or take a picture of the Site Code for the next step.

Figure 4: Control Assistant example of License Authorization screen.
Step 5
Visit the Woodward website at http://www.woodward.com and login to your free account. If you do not have an account, you will need to make one now to be able to license your software. In the Account menu on the left side, select the Software Authorization link that appears.
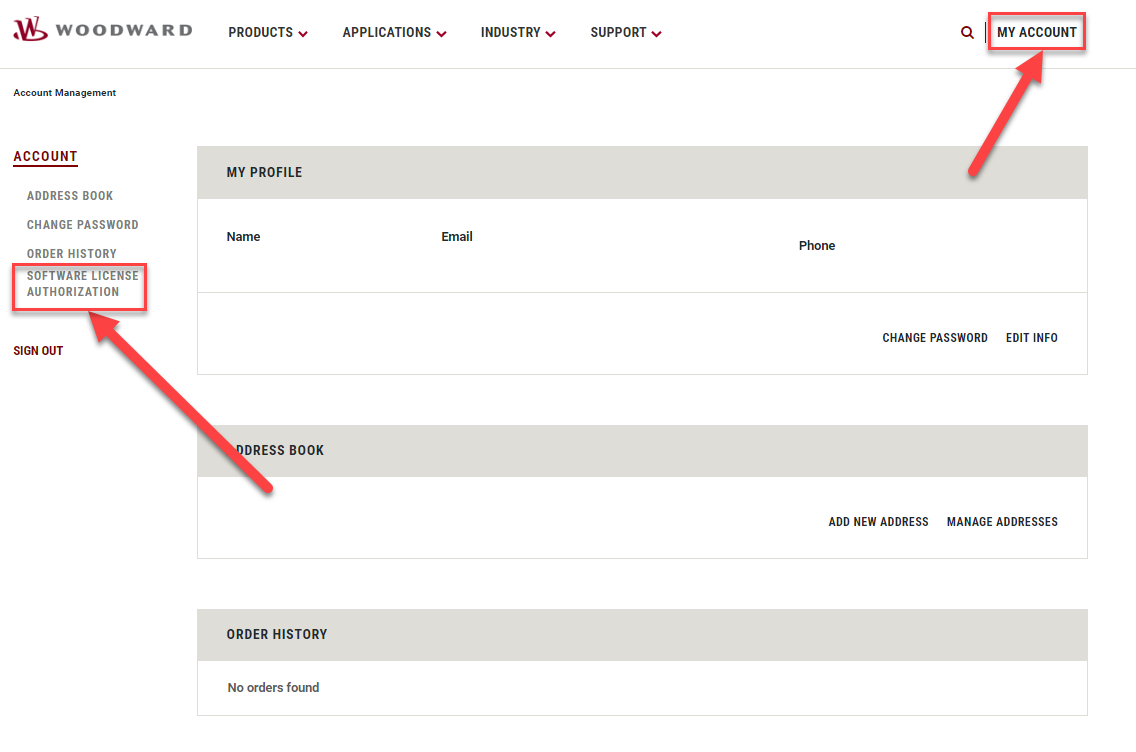
Figure 5: Woodward website for Software Authorization.
Step 6
Users are required to login prior to licensing software. Login using Woodward website credentials or create an account.
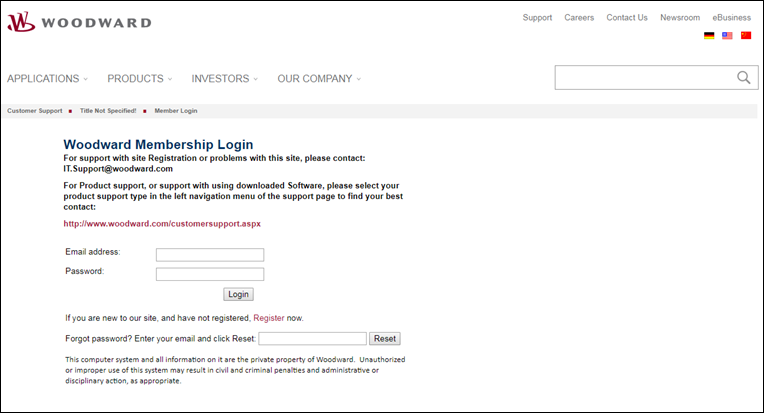
Figure 6: Woodward login required prior to Software Authorization.
Step 7
Once login is successful, the serial number and site code can be entered to generate the license code once the Authorize option is selected. It is recommended to "Send my license key certificate by e-mail" to serve as a backup. If email is not an option, it is recommended to take a screenshot of the license code and serial in Step 8 for documentation.
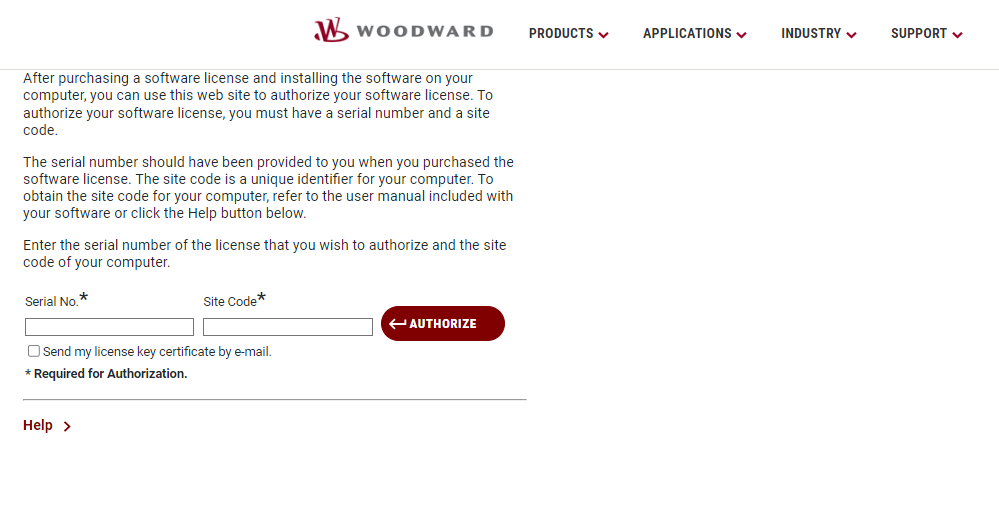
Figure 7: Woodward website license authorization page.
Step 8
If successful, the license number should be provided as shown in the following screenshot. If not successful, an error message should be produced. Start by ensuring that the serial number and site code have been entered correctly. If the error persists, take a screenshot of the error and send it to Woodward Support.
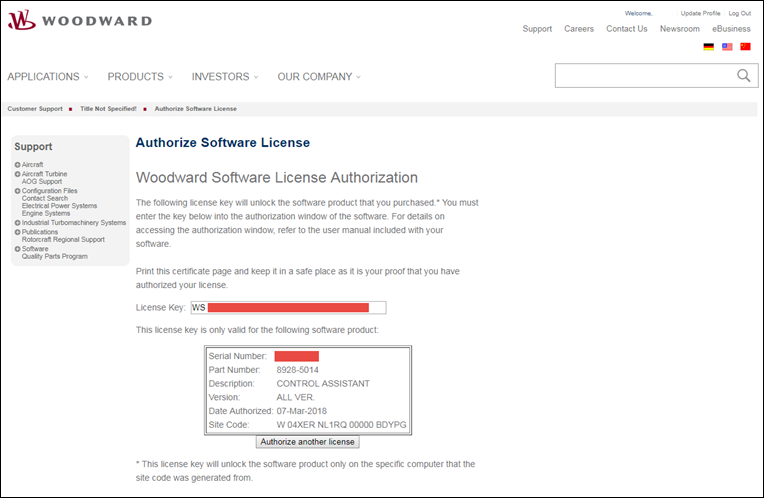
Figure 8: Woodward website successful authorization page.
Step 9
Copy the License Key from the Woodward website and paste into the License Authorization screen from Step 4. Select OK to complete the process.
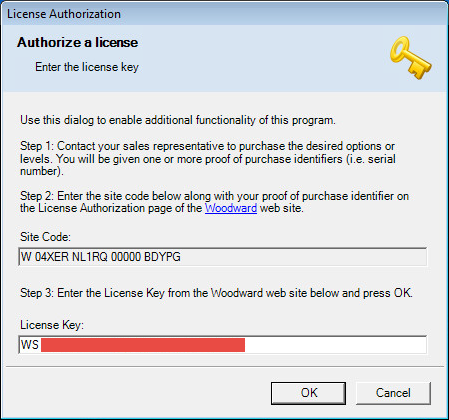
Figure 9: Control Assistant example of completed License Authorization screen.
Step 10
If the process was successful, the Authorize option should now be grayed out. If not successful, an error message should be produced. Ensure that the license key has been entered correctly. If the error persists, take a screenshot of the error and send it to Woodward Support.
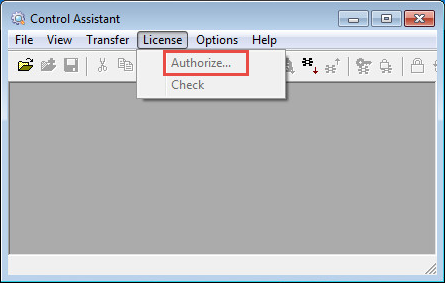
Figure 10: Control Assistant example of successfully authorized license.
 日本語
日本語
Comments (6)