


A logconfig file is used to manage the GAP variables in the Datalog. The logconfig file is created and edited in Control Assistant. It requires a DATALOG_M block in the GAP application and Coder 4.02 or later. SOS Servlink must be able to connect to the control. Also, AppManager must be able to connect to the control to load the logconfig file.
Step 1 - Connect to the control system
The SOS OPC server is a Woodward service tool that allows the user to create an OPC server that hosts all of the Gap block values available on the MicroNet+ control system. This is primarily used for Monitor Gap, Control Assistant Winpanel, and Control Assistant Trending functionality. This guide utilizes the SOS OPC server for the Control Assistant functionality.
The latest version of SOS is recommended (4.13 at the time of writing), especially for recent CPUs such as the 5466-1145/1245/1510. If the latest SOS version has issues at an older site, using the version installed on the site HMI is recommended.
1.1 - Open Control Assistant
Open Control Assistant and select File - New Datalog Configuration.
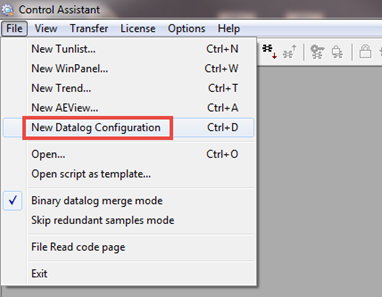
Figure 1: Open New Datalog Configuration in Control Assistant
1.2 - Connect Control Assistant to the control system via SOS Servlink
Connect to the control via SOS Servlink by right clicking on <<not connected>> and select ‘Connect OPC Browser…’ In the OPC Connection window make sure “Servlink OPC server” and “Local Server” are selected. If connection was successful, the Control ID will now be in the browse tree on the left.
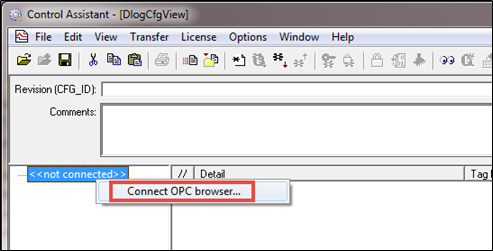
Figure 2: Connect to control via SOS
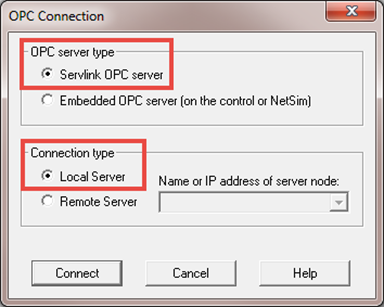
Figure 3: OPC Connection Window
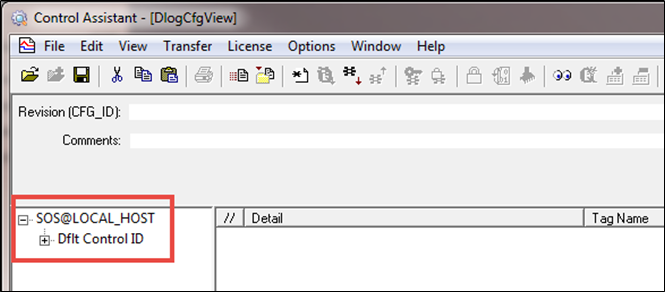
Figure 4: Connection to SOS established
Step 2 - Configure and save the logconfig file
2.1 - Configure logconfig file
Expand the control in the browse tree. Double click on a value or drag and drop into the “.logconfig” list. The Detail name is the name by which the GAP application knows the variable. The Tag Name should be a more descriptive name which will be used by Control Assistant when displaying the log file. The Tag Name can be edited after dropped in the “.logconfig” list.
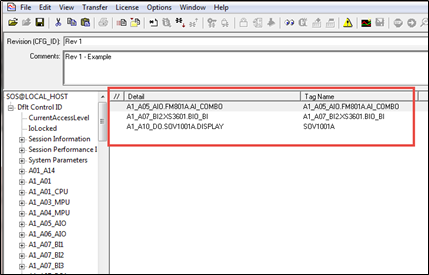
Figure 5: .logconfig file
2.2 - Revision and comments
Revision (CFG_ID) must have a value. Start with Rev 1 and increase revision as needed. Notes about each revision should be added in the Comments section. The Revision will be displayed as the CFG_ID output field of the DATA_LOG_M block in GAP.
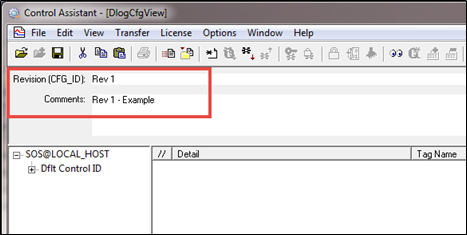
Figure 6: CFG_ID and comments
2.3 - Save logconfig file
Save the file. The file name must be the same as what is configured in the DATALOG block in GAP.
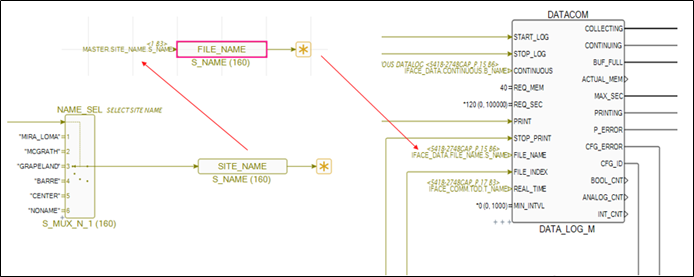
Figure 7: File name on DATA_LOG_M block in GAP
Step 3 - Load logconfig to the control
3.1 - AppManager
Open AppManager and connect to the control. Highlight the correct control and then select “Transfer Application Files to the Current Control.” The logconfig file will need to be transferred to both CPUs on a redundant control.
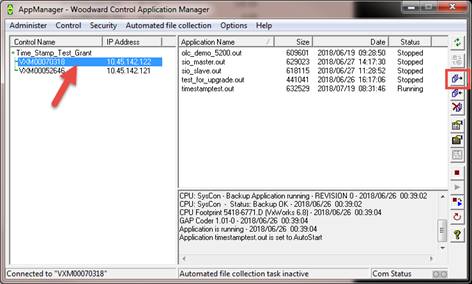 Figure 8: AppManager
3.2 - Transfer File
In the window that opens, browse to the logconfig file to be loaded to the control. Make sure File Type is set to “All Files.” Select Open.
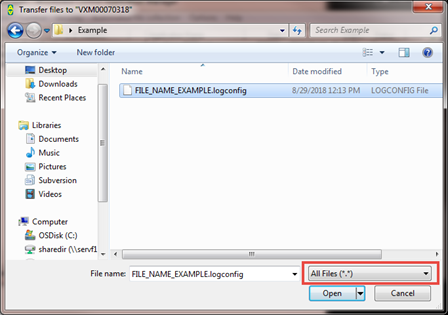
Figure 9: Transfer file to control
3.3 - Confrim
To see if the file transferred, select “Receive Files from the Current Control” and look for the file. Once file is found, select Cancel.
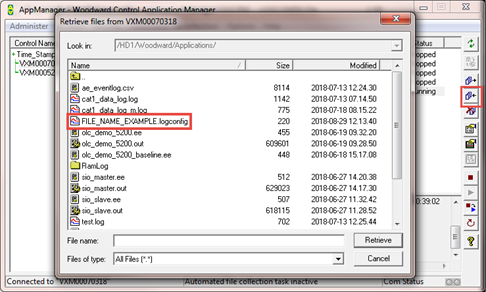
Figure 10: Confirm file was transferred